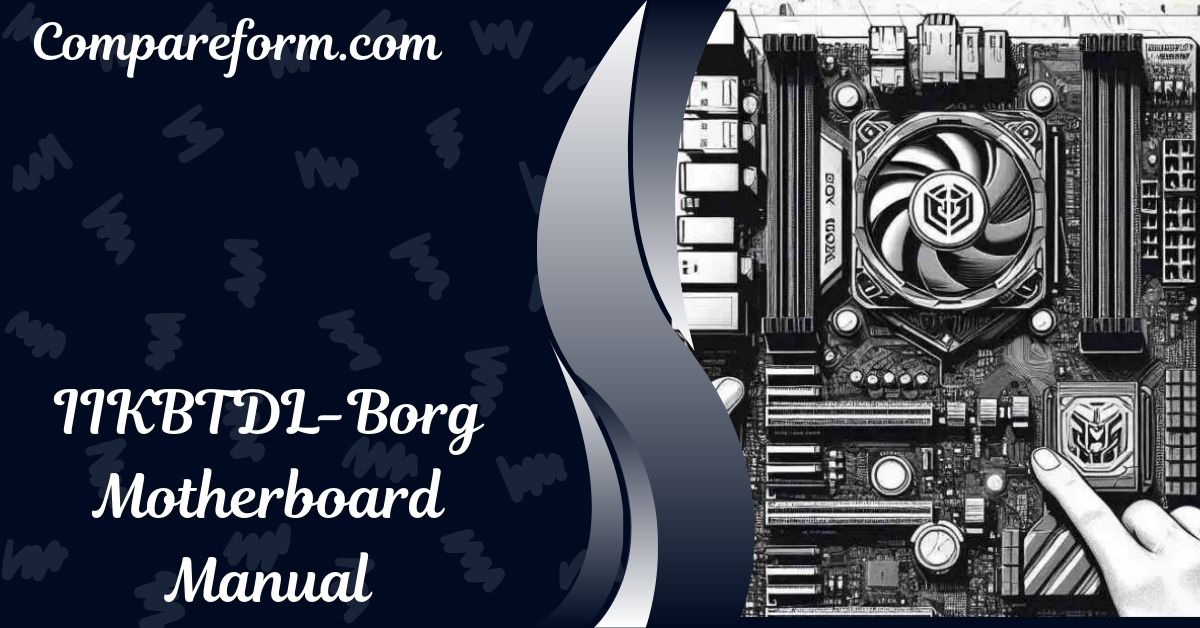
IIKBTDL-Borg Motherboard Manual: Everything You Need to Know
Building a computer or upgrading your system? You’ve likely come across the IIKBTDL-Borg motherboard. Whether you’re assembling a high-performance gaming rig, creating a powerful workstation, or simply upgrading your desktop, this motherboard is designed to provide the robust foundation you need.
But to make the most out of this cutting-edge technology, understanding the IIKBTDL-Borg motherboard manual is crucial. This comprehensive guide will walk you through every aspect of the IIKBTDL-Borg motherboard manual, from unboxing to setup, and from troubleshooting to advanced configurations.
What is the IIKBTDL-Borg Motherboard?
Overview of the IIKBTDL-Borg Motherboard
The IIKBTDL-Borg motherboard is a versatile and powerful component designed to be the backbone of your computer system. Whether you’re a gamer, a professional requiring a high-performance workstation, or simply building a reliable desktop for everyday tasks, this motherboard offers the flexibility and features you need.
Manufactured with top-quality components and built to support the latest technology, the IIKBTDL-Borg motherboard ensures a reliable and efficient performance. It supports a wide range of processors, memory types, and peripherals, making it a popular choice among PC enthusiasts.
Key Features and Specifications
Before diving into the specifics of the manual, let’s take a look at some of the key features and specifications of the IIKBTDL-Borg motherboard:
- Processor Support: Compatible with the latest Intel and AMD processors.
- Memory: Supports DDR4/DDR5 RAM, with up to 128GB capacity.
- Expansion Slots: Includes multiple PCIe slots for graphics cards, network cards, and other peripherals.
- Storage Options: Provides multiple SATA ports and M.2 slots for SSDs and HDDs.
- USB Ports: Offers a variety of USB 3.2 and USB-C ports for fast data transfer.
- Audio: Integrated high-definition audio with support for 7.1 surround sound.
- Networking: Built-in gigabit Ethernet and support for Wi-Fi 6.
- Cooling: Multiple fan headers and support for liquid cooling systems.
- BIOS/UEFI: User-friendly interface with overclocking features.
With these features, the IIKBTDL-Borg motherboard provides a solid foundation for any computer build, offering both performance and reliability.
Why the IIKBTDL-Borg Motherboard?
Benefits for Gamers
If you’re a gamer, the IIKBTDL-Borg motherboard is an excellent choice. It supports the latest multi-core processors, high-speed memory, and cutting-edge graphics cards, ensuring you get the best gaming experience. With overclocking capabilities and advanced cooling options, this motherboard allows you to push your hardware to its limits without compromising stability.
Advantages for Workstations
For professionals who need a powerful workstation, the IIKBTDL-Borg motherboard offers the performance and reliability required for demanding applications such as video editing, 3D rendering, and software development. Its support for large amounts of RAM and multiple GPUs makes it ideal for tasks that require significant processing power.
Versatility for Standard Desktops
Even if you’re building a standard desktop for everyday use, the IIKBTDL-Borg motherboard’s versatility ensures that your system can handle anything from basic tasks to more intensive applications. Its comprehensive feature set makes it suitable for both entry-level and advanced users.
Unboxing Your IIKBTDL-Borg Motherboard
What’s Included in the Box?
When you unbox your IIKBTDL-Borg motherboard, you should find the following items:
- The IIKBTDL-Borg motherboard
- User manual
- SATA cables
- I/O shield
- Driver CD or USB (if provided)
- Screws and standoffs
- M.2 mounting kit (if applicable)
It’s essential to check that all components are present and in good condition. If anything is missing or damaged, contact the retailer or manufacturer for assistance.
Inspecting the Motherboard
Before you begin the installation, take a few minutes to inspect the motherboard for any visible damage. Check for bent pins in the CPU socket, damaged connectors, or any other signs of wear and tear. If everything looks good, you’re ready to start the installation process.
Preparing for Installation
Tools You’ll Need
To install your IIKBTDL-Borg motherboard, you’ll need the following tools:
- Phillips head screwdriver
- Anti-static wrist strap (recommended)
- Thermal paste (if installing a new CPU)
- Cable ties (for cable management)
- A clean, flat workspace
Safety Precautions
Before handling your motherboard or any other components, it’s important to take a few safety precautions:
- Ground Yourself: Use an anti-static wrist strap to prevent electrostatic discharge (ESD) from damaging your components.
- Handle Components Carefully: Always hold the motherboard by its edges and avoid touching the pins, connectors, or circuits.
- Work in a Clean Environment: Ensure your workspace is clean and free of dust or debris that could interfere with the installation.
Preparing Your Case
Before installing the motherboard, you’ll need to prepare your case:
- Remove the Side Panels: Open your computer case by removing the side panels, giving you access to the interior.
- Install Standoffs: Attach the standoffs in the case to align with the screw holes on the motherboard. These standoffs prevent the motherboard from touching the metal case, avoiding short circuits.
- Install the I/O Shield: Insert the I/O shield (included with the motherboard) into the back of the case. Make sure it’s securely in place, as it helps align the ports on the motherboard with the openings in the case.
Installing the IIKBTDL-Borg Motherboard
Step-by-Step Installation Guide
With your case prepared, you’re ready to install the IIKBTDL-Borg motherboard. Follow these steps:
- Position the Motherboard: Carefully place the motherboard into the case, aligning it with the standoffs and the I/O shield.
- Secure the Motherboard: Use the screws provided to secure the motherboard to the standoffs. Tighten the screws evenly, but avoid overtightening to prevent damage.
- Install the CPU: If you haven’t already, install the CPU by opening the CPU socket, aligning the processor with the socket (match the triangle marking), and gently placing it in position. Close the socket latch to secure the CPU.
- Apply Thermal Paste: If you’re installing a new CPU, apply a small amount of thermal paste to the center of the CPU. This helps to conduct heat between the CPU and the cooler.
- Install the CPU Cooler: Attach the CPU cooler according to the manufacturer’s instructions. Ensure that it’s securely fastened to the motherboard and connected to the appropriate fan header.
- Install RAM Modules: Insert the RAM modules into the memory slots on the motherboard. Press down firmly until the modules click into place, ensuring that the notches on the RAM align with the slots.
- Connect Power Supply: Connect the 24-pin ATX power connector and the 8-pin CPU power connector from the power supply to the motherboard. Make sure the connections are secure.
- Install Storage Drives (HDD/SSD): Connect your storage drives (HDD or SSD) to the motherboard using the provided SATA cables or M.2 slots. Secure the drives in the case if needed.
- Connect Peripheral Devices: Connect any additional peripherals such as the front panel connectors, USB ports, audio jacks, and case fans. Refer to the manual for the correct pin configurations.
Installing the CPU
The CPU is one of the most critical components in your build. Installing it correctly is crucial to the overall performance of your system. Make sure you follow the manufacturer’s instructions carefully and double-check the orientation of the CPU before locking it in place.
Installing RAM Modules
Properly installing your RAM is essential for your computer’s performance. Make sure that the RAM sticks are fully seated in the slots, and that you’ve installed them in the correct configuration (dual-channel, etc.) as recommended in the motherboard manual.
Connecting Power Supply
The power supply is the lifeblood of your computer, providing power to all components. Ensure that all connections are secure and that the cables are properly managed to avoid obstructing airflow inside the case.
Installing Storage Drives (HDD/SSD)
Your storage drives (HDD/SSD) are where your data is stored. Proper installation and secure connections are crucial to avoid data loss and ensure fast data access.
Connecting Peripheral Devices
Connecting peripheral devices such as USB ports, front panel connectors, and audio jacks can seem tricky, but it’s essential for full functionality. Consult the manual to ensure you’re connecting everything correctly.
BIOS Setup and Configuration
Accessing the BIOS
After installing all the components, it’s time to configure your motherboard’s BIOS (Basic Input/Output System). The BIOS controls the hardware settings and allows you to optimize the performance of your system.
To access the BIOS:
- Power On: Turn on your computer.
- Press the BIOS Key: As the system starts, press the BIOS key (usually Delete, F2, or F10) repeatedly until the BIOS screen appears.
Key BIOS Settings to Adjust
Once you’re in the BIOS, there are several key settings you may want to adjust:
- Boot Order: Set the priority of your storage devices to determine where the computer looks for the operating system first.
- Memory Settings: Adjust the frequency and timings of your RAM to ensure optimal performance.
- CPU Settings: Check the CPU settings to ensure it’s running at the correct speed and voltage.
- Overclocking: If you plan to overclock your CPU or RAM, you can do so in the BIOS. Be cautious and make incremental changes to avoid instability.
Configuring Boot Options
Configuring the boot options is crucial, especially if you’re installing an operating system or dual-booting. Set the primary boot device to the drive where your operating system is installed.
Overclocking Settings
Overclocking can boost the performance of your CPU and RAM, but it requires careful tuning. The IIKBTDL-Borg motherboard provides a user-friendly interface for overclocking, but it’s essential to monitor the system’s stability and temperatures closely.
Connecting Additional Components
Graphics Cards Installation
If you’re installing a dedicated graphics card, follow these steps:
- Select the PCIe Slot: Insert the graphics card into the top PCIe slot (usually the fastest one).
- Secure the Card: Use screws to secure the card to the case.
- Connect Power: If your graphics card requires additional power, connect the appropriate power cables from the PSU.
- Install Drivers: After booting up, install the necessary drivers for your graphics card.
Adding Expansion Cards
The IIKBTDL-Borg motherboard supports a variety of expansion cards, such as network cards, sound cards, and more. Insert these cards into the available PCIe slots and secure them with screws. Install the necessary drivers once your system is up and running.
Setting Up Cooling Systems
Cooling is critical, especially if you’re overclocking or running high-performance components. The IIKBTDL-Borg motherboard has multiple fan headers and supports liquid cooling systems. Connect the fans and pumps to the appropriate headers, and configure the fan curves in the BIOS or software to optimize cooling performance.
Troubleshooting Common Issues
No Power/No Boot Issues
If your system doesn’t power on or boot:
- Check Power Connections: Ensure all power cables are securely connected.
- Inspect Components: Check that the CPU, RAM, and GPU are properly seated.
- Reset BIOS: Try resetting the BIOS by removing the CMOS battery for a few minutes.
Display Problems
If you’re not getting a display:
- Check Monitor Connections: Ensure the monitor is connected to the correct port on the GPU.
- Test with Integrated Graphics: If your CPU has integrated graphics, try connecting the monitor directly to the motherboard to rule out a GPU issue.
Connectivity Issues
If you’re experiencing connectivity issues:
- Check Drivers: Ensure all drivers, especially for the network card, are installed and up to date.
- Inspect Cables: Verify that all cables, including Ethernet and USB, are securely connected.
Audio Problems
For audio issues:
- Check Audio Settings: Ensure the correct audio device is selected in your operating system.
- Test with Headphones: Try connecting headphones to different audio jacks to rule out hardware issues.
Maintenance and Upgrades
Keeping Your Motherboard Clean
Regular maintenance is essential for keeping your motherboard in top condition. Dust can accumulate on the motherboard, leading to overheating and performance issues. Use compressed air to clean the motherboard and other components periodically.
Upgrading Components
As technology advances, you may want to upgrade your components. The IIKBTDL-Borg motherboard supports a wide range of CPUs, GPUs, and RAM, making it easy to upgrade your system without replacing the entire motherboard.
Firmware and Driver Updates
Updating the motherboard’s firmware (BIOS) and drivers is crucial for maintaining compatibility with new hardware and improving system stability. Check the manufacturer’s website regularly for updates.
Frequently Asked Questions
What should I do if my IIKBTDL-Borg motherboard doesn’t power on?
Check all power connections, ensure the power supply is functional, and verify that the CPU and RAM are correctly installed. If the problem persists, try resetting the BIOS by removing the CMOS battery.
How can I optimize the BIOS settings on my IIKBTDL-Borg motherboard?
Start by configuring the boot order and memory settings. If you’re experienced, you can also explore overclocking options, but proceed with caution to avoid system instability.
Is it necessary to update the BIOS regularly?
While it’s not always necessary, updating the BIOS can improve system stability, compatibility with new hardware, and occasionally introduce new features. Always back up your system before performing a BIOS update.
How do I connect additional fans to my IIKBTDL-Borg motherboard?
The IIKBTDL-Borg motherboard has multiple fan headers. Connect the fan cables to these headers, and use the BIOS or software to configure the fan speeds.
What type of RAM is compatible with the IIKBTDL-Borg motherboard?
The IIKBTDL-Borg motherboard supports DDR4 or DDR5 RAM, depending on the model. Check the motherboard manual for the specific RAM requirements and compatibility.
Final Thoughts
The IIKBTDL-Borg motherboard is a powerful and versatile component that can serve as the foundation for a wide range of computer builds. By following this comprehensive guide, you should now have a deeper understanding of how to install, configure, and troubleshoot your motherboard. Whether you’re building a gaming rig, a professional workstation, or a standard desktop, the IIKBTDL-Borg motherboard offers the features and performance you need.